Setting Up and Using Your Apple TV – Computer
In order for you to use your Apple TV in the classroom there are a few steps you must complete and then you will be able to wireless project what is on your computer onto the screen. To use Airplay on your laptop, you need to be updated to the latest operating system. This means you will lose access to the Microsoft Office applications but LibreOffice and Google Docs will allow you to access all of those documents and presentations you have. The update software should be found in Self Service in your Applications folder on your computer.
1. Turn on the projector and the Apple TV. You should see the light on the front of the Apple TV turn on.
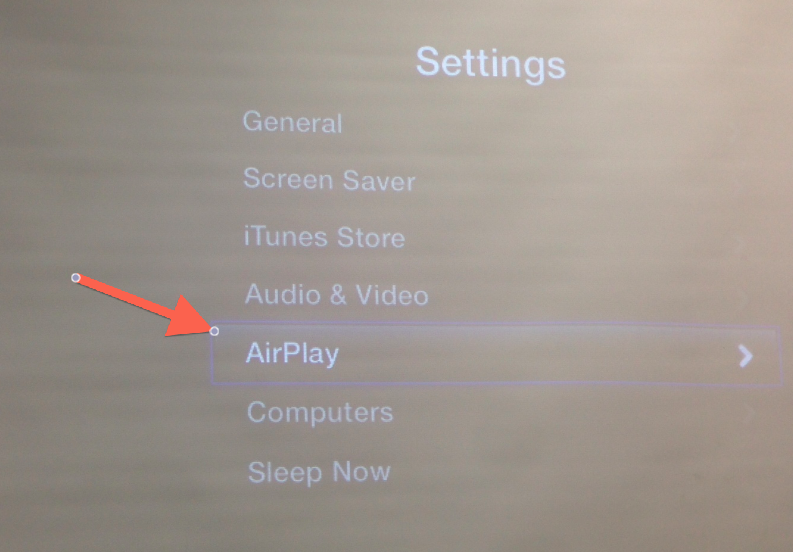
2. Use the Apple TV remote and select “Settings”.

3. Go to “Airplay”.
4. Select “On screen code” and set it to “on” if you want the code to pop up on the screen every time a device tries to connect. This is useful if you do not want to type in the password every time you have a student present. This also keeps others from being able to access your Apple TV from another room since they won’t be able to see the code. Otherwise, leave this set to off and you will just have to use the password that was sent to you earlier.

5. Press the Menu button on the Apple TV remote until you are back to the main screen.
6. On your computer, click the Airplay logo in the upper right of your screen.

7. Select the correct Apple TV for your room. The room numbers are after the AHSRM.
8. A 4 digit code will pop up on the projector, type this into the box that appears on your computer.
9. You should now see your computer screen is being projected by the projector.
10. If you want to change the display settings, select the Airplay logo on your computer and then select “Open Display Preferences”. You can change the settings here to make it look the way you want.

11. Important Tip = you can use easily zoom in on anything on your screen using a simple key command on your computer. Hold down “Control” and use two fingers to scroll up on the touchpad to zoom in on the part of the screen where your cursor is. To zoom out you will need to just hold “control” again and use two fingers to scroll down.
Setting Up and Using Your Apple TV – iPad, iPhone, iPod Touch (iOS 6 and below)
Steps 1 – 5 are the same as above.
6. Double click the home button on the bottom of your device. Swipe the row that pops up to the right.

7. Touch the Airplay logo and select the Apple TV you want to connect to. Enter the code that appears on the projector (if you have it set up that way).


8. If you want to mirror the whole screen of your device, select “Mirroring”. If you just want to project a movie or song onto the Apple TV, you do not need to select “Mirroring”.

Setting Up and Using Your Apple TV – iPad, iPhone, iPod Touch (iOS 7 and above)
Steps 1 – 5 are the same as above.
6. Swipe up from the bottom of the screen to expose the control panel and select the Airplay icon.

8. Select the room for the Apple TV you want to us. Enter the code that appears on the screen if you have it set up that way.

9. If you want to mirror the whole screen of your device, select “Mirroring”. If you just want to project a movie or song onto the Apple TV, you do not need to select “Mirroring”.

